체크포인트
Deploy infrastructure with Terraform
/ 100
Deploy Kubernetes Load Balancer Service with Terraform
GSP233

Overview
In Terraform, a Provider is the logical abstraction of an upstream API. This lab will show you how to set up a Kubernetes cluster and deploy Load Balancer type NGINX service on it.
Objectives
In this lab, you will learn how to:
- Deploy a Kubernetes cluster along with a service using Terraform
Prerequisites
For this lab, you should have experience with the following:
- Familiarity with Kubernetes Services
- Familiarity with
kubectlCLI.
Setup and requirements
Before you click the Start Lab button
Read these instructions. Labs are timed and you cannot pause them. The timer, which starts when you click Start Lab, shows how long Google Cloud resources will be made available to you.
This hands-on lab lets you do the lab activities yourself in a real cloud environment, not in a simulation or demo environment. It does so by giving you new, temporary credentials that you use to sign in and access Google Cloud for the duration of the lab.
To complete this lab, you need:
- Access to a standard internet browser (Chrome browser recommended).
- Time to complete the lab---remember, once you start, you cannot pause a lab.
How to start your lab and sign in to the Google Cloud console
-
Click the Start Lab button. If you need to pay for the lab, a pop-up opens for you to select your payment method. On the left is the Lab Details panel with the following:
- The Open Google Cloud console button
- Time remaining
- The temporary credentials that you must use for this lab
- Other information, if needed, to step through this lab
-
Click Open Google Cloud console (or right-click and select Open Link in Incognito Window if you are running the Chrome browser).
The lab spins up resources, and then opens another tab that shows the Sign in page.
Tip: Arrange the tabs in separate windows, side-by-side.
Note: If you see the Choose an account dialog, click Use Another Account. -
If necessary, copy the Username below and paste it into the Sign in dialog.
{{{user_0.username | "Username"}}} You can also find the Username in the Lab Details panel.
-
Click Next.
-
Copy the Password below and paste it into the Welcome dialog.
{{{user_0.password | "Password"}}} You can also find the Password in the Lab Details panel.
-
Click Next.
Important: You must use the credentials the lab provides you. Do not use your Google Cloud account credentials. Note: Using your own Google Cloud account for this lab may incur extra charges. -
Click through the subsequent pages:
- Accept the terms and conditions.
- Do not add recovery options or two-factor authentication (because this is a temporary account).
- Do not sign up for free trials.
After a few moments, the Google Cloud console opens in this tab.

Activate Cloud Shell
Cloud Shell is a virtual machine that is loaded with development tools. It offers a persistent 5GB home directory and runs on the Google Cloud. Cloud Shell provides command-line access to your Google Cloud resources.
- Click Activate Cloud Shell
at the top of the Google Cloud console.
When you are connected, you are already authenticated, and the project is set to your Project_ID,
gcloud is the command-line tool for Google Cloud. It comes pre-installed on Cloud Shell and supports tab-completion.
- (Optional) You can list the active account name with this command:
- Click Authorize.
Output:
- (Optional) You can list the project ID with this command:
Output:
gcloud, in Google Cloud, refer to the gcloud CLI overview guide.
Kubernetes services
A service is a grouping of pods that are running on the cluster. Services are "cheap" and you can have many services within the cluster. Kubernetes services can efficiently power a microservice architecture.
Services provide important features that are standardized across the cluster: load-balancing, service discovery between applications, and features to support zero-downtime application deployments.
Each service has a pod label query which defines the pods which will process data for the service. This label query frequently matches pods created by one or more replication controllers. Powerful routing scenarios are possible by updating a service's label query via the Kubernetes API with deployment software.
Why Terraform?
While you could use kubectl or similar CLI-based tools mapped to API calls to manage all Kubernetes resources described in YAML files, orchestration with Terraform presents a few benefits:
- One language - You can use the same configuration language to provision the Kubernetes infrastructure and to deploy applications into it.
-
Drift detection -
terraform planwill always present you the difference between reality at a given time and the config you intend to apply. - Full lifecycle management - Terraform doesn't just initially create resources, but offers a single command to create, update, and delete tracked resources without needing to inspect the API to identify those resources.
- Synchronous feedback - While asynchronous behavior is often useful, sometimes it's counter-productive as the job of identifying operation results (failures or details of created resource) is left to the user. e.g. you don't have the IP/hostname of the load balancer until it has finished provisioning, hence you can't create any DNS record pointing to it.
- Graph of relationships - Terraform understands relationships between resources which may help in scheduling - e.g. Terraform won't try to create a service in a Kubernetes cluster until the cluster exists.
Task 1. Clone the sample code
- In Cloud Shell, start by cloning the sample code:
- Navigate to the
tf-gke-k8s-service-lbdirectory:
Task 2. Understand the code
- Review the contents of the
main.tffile:
Example output:
- Variables are defined for
region,zone, andnetwork_name. These will be used to create the Kubernetes cluster. - The Google Cloud provider will let us create resources in this project.
- There are several resources defined to create the appropriate network and cluster.
- At the end, there are some outputs which you'll see after running
terraform apply.
- Review the contents of the
k8s.tffile:
Example output:
- The script configures a Kubernetes provider with Terraform and creates the service, namespace and a replication_controller resource.
- The script returns an
nginxservice IP as an output.
Task 3. Initialize and install dependencies
The terraform init command is used to initialize a working directory containing the Terraform configuration files.
This command performs several different initialization steps in order to prepare a working directory for use and is always safe to run multiple times, to bring the working directory up to date with changes in the configuration:
- Run
terraform init:
Example output:
- Run the
terraform applycommand, which is used to apply the changes required to reach the desired state of the configuration:
-
Review Terraform's actions and inspect the resources which will be created.
-
When ready, type yes to begin Terraform actions.
On completion, you should see similar output:
Example output:
Verify resources created by Terraform
- In the console, navigate to Navigation menu > Kubernetes Engine.
- Click on
tf-gke-k8scluster and check its configuration. - In the left panel, click Gateways, Services & Ingress and check the
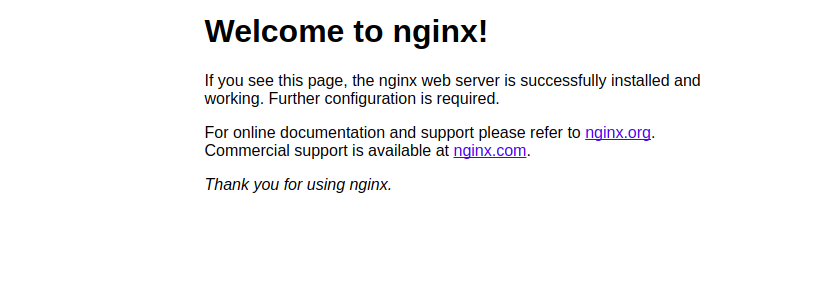
nginxservice status. - Click the Endpoints IP address to open the
Welcome to nginx!page in a new browser tab.
Click Check my progress to verify your performed task. If you have successfully deployed infrastructure with Terraform, you will see an assessment score.
Congratulations!
In this lab, you used Terraform to initialize, plan, and deploy a Kubernetes cluster along with a service.
Finish your quest
This self-paced lab is part of the Managing Cloud Infrastructure with Terraform and DevOps Essentials quests. A quest is a series of related labs that form a learning path. Completing a quest earns you a badge to recognize your achievement. You can make your badge or badges public and link to them in your online resume or social media account. Enroll in any quest that contains this lab and get immediate completion credit. See the Google Cloud Skills Boost catalog to see all available quests.
Take your next lab
Continue your Quest with HTTPS Content-Based Load balancer with Terraform, or check out these suggestions:
Next steps / Learn more
See how others experience Terraform in the Community.
Google Cloud training and certification
...helps you make the most of Google Cloud technologies. Our classes include technical skills and best practices to help you get up to speed quickly and continue your learning journey. We offer fundamental to advanced level training, with on-demand, live, and virtual options to suit your busy schedule. Certifications help you validate and prove your skill and expertise in Google Cloud technologies.
Manual Last Updated April 01, 2024
Lab Last Tested April 01, 2024
Copyright 2024 Google LLC All rights reserved. Google and the Google logo are trademarks of Google LLC. All other company and product names may be trademarks of the respective companies with which they are associated.