Points de contrôle
Create a VPC network and firewall rules
/ 5
Create the VM instance with no public IP address
/ 5
Create the Bastion host
/ 5
Create a Cloud Storage Bucket and Enable Private Google Access
/ 5
Configure a Cloud NAT gateway
/ 5
Configuring Private Google Access and Cloud NAT
GSP459

Overview
Google Cloud’s Network Address Translation (NAT) service enables you to provision your application instances without public IP addresses while also allowing them to access the internet for updates, patching, config management, and more in a controlled and efficient manner.
In this lab, you will configure Private Google Access and Cloud NAT for a VM instance that doesn't have an external IP address. Then, you will verify access to public IP addresses of Google APIs and services and other connections to the internet. Finally, you will use Cloud NAT logging to record connections made in your gateway.
What you'll learn
In this lab, you will learn how to perform the following tasks:
- Configure a VM instance that doesn't have an external IP address.
- Create a bastion host to connect to the VM that doesn't have an external IP address.
- Enable Private Google Access on a subnet.
- Configure a Cloud NAT gateway.
- Verify access to public IP addresses of Google APIs and services and other connections to the internet.
- Log NAT connections with Cloud NAT logging.
Setup and requirements
Before you click the Start Lab button
Read these instructions. Labs are timed and you cannot pause them. The timer, which starts when you click Start Lab, shows how long Google Cloud resources will be made available to you.
This hands-on lab lets you do the lab activities yourself in a real cloud environment, not in a simulation or demo environment. It does so by giving you new, temporary credentials that you use to sign in and access Google Cloud for the duration of the lab.
To complete this lab, you need:
- Access to a standard internet browser (Chrome browser recommended).
- Time to complete the lab---remember, once you start, you cannot pause a lab.
How to start your lab and sign in to the Google Cloud console
-
Click the Start Lab button. If you need to pay for the lab, a pop-up opens for you to select your payment method. On the left is the Lab Details panel with the following:
- The Open Google Cloud console button
- Time remaining
- The temporary credentials that you must use for this lab
- Other information, if needed, to step through this lab
-
Click Open Google Cloud console (or right-click and select Open Link in Incognito Window if you are running the Chrome browser).
The lab spins up resources, and then opens another tab that shows the Sign in page.
Tip: Arrange the tabs in separate windows, side-by-side.
Note: If you see the Choose an account dialog, click Use Another Account. -
If necessary, copy the Username below and paste it into the Sign in dialog.
{{{user_0.username | "Username"}}} You can also find the Username in the Lab Details panel.
-
Click Next.
-
Copy the Password below and paste it into the Welcome dialog.
{{{user_0.password | "Password"}}} You can also find the Password in the Lab Details panel.
-
Click Next.
Important: You must use the credentials the lab provides you. Do not use your Google Cloud account credentials. Note: Using your own Google Cloud account for this lab may incur extra charges. -
Click through the subsequent pages:
- Accept the terms and conditions.
- Do not add recovery options or two-factor authentication (because this is a temporary account).
- Do not sign up for free trials.
After a few moments, the Google Cloud console opens in this tab.

Activate Cloud Shell
Cloud Shell is a virtual machine that is loaded with development tools. It offers a persistent 5GB home directory and runs on the Google Cloud. Cloud Shell provides command-line access to your Google Cloud resources.
- Click Activate Cloud Shell
at the top of the Google Cloud console.
When you are connected, you are already authenticated, and the project is set to your Project_ID,
gcloud is the command-line tool for Google Cloud. It comes pre-installed on Cloud Shell and supports tab-completion.
- (Optional) You can list the active account name with this command:
- Click Authorize.
Output:
- (Optional) You can list the project ID with this command:
Output:
gcloud, in Google Cloud, refer to the gcloud CLI overview guide.
Task 1. Create the VM instances
You will now create one VM instance that has no external IP address and another VM instance to serve as a bastion host.
Create a VPC network and firewall rules
First, create a VPC network for the VM instances and a firewall rule to allow SSH access.
-
In the Cloud Console, on the Navigation menu (
), click VPC network > VPC networks.
-
Click Create VPC Network.
-
For Name, type privatenet.
-
For Subnet creation mode, click Custom.
-
Specify the following, and leave the remaining settings as their defaults:
Property Value (type value or select option as specified) Name privatenet-us Region IP address range 10.130.0.0/20
-
Click Done.
-
Click Create and wait for the network to be created.
-
In the left pane, click Firewall.
-
Click Create Firewall Rule.
-
Specify the following, and leave the remaining settings as their defaults:
Property Value (type value or select option as specified) Name privatenet-allow-ssh Network privatenet Targets All instances in the network Source filter IPv4 ranges Source IPv4 ranges 0.0.0.0/0 Protocols and ports Specified protocols and ports -
For tcp, specify port 22.
-
Click Create.
Click Check my progress to verify the objective.
Create the VM instance with no public IP address
-
In the Cloud Console, on the Navigation menu (
-
Click Create Instance.
-
Specify the following, and leave the remaining settings as their defaults:
Property Value (type value or select option as specified) Name vm-internal Region Zone Machine type e2-medium(2 vCPU, 1 core, 4 GB memory) -
Click Advanced Options.
-
Click Networking.
-
For Network interfaces.
-
Specify the following, and leave the remaining settings as their defaults:
Property Value (type value or select option as specified) Network privatenet Subnetwork privatenet-us External IPv4 address None
- Click Done.
- Click Create, and wait for the VM instance to be created.
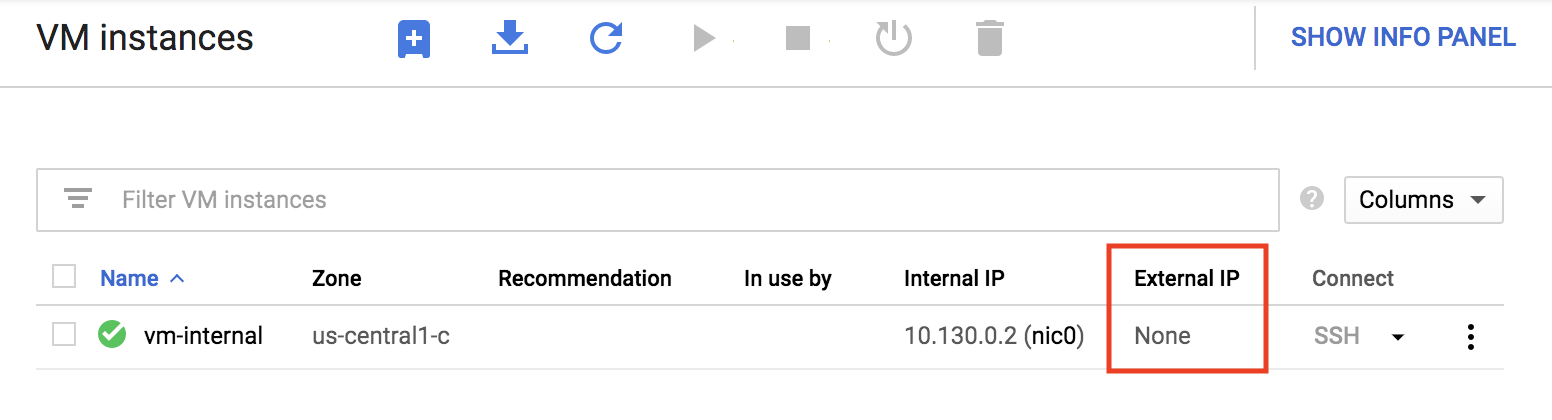
- On the VM instances page, verify that the External IP of vm-internal is None.
Click Check my progress to verify the objective.
Create the bastion host
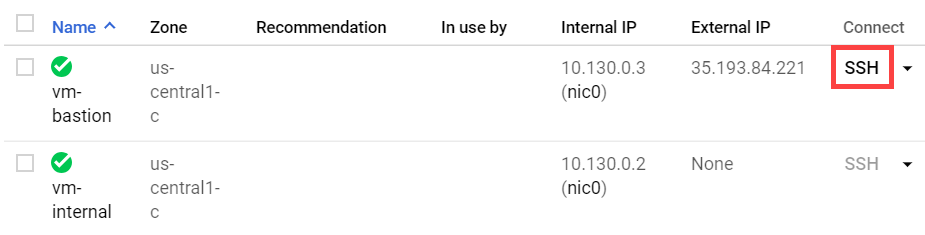
Because vm-internal has no external IP address, it can only be reached by other instances on the network or via a managed VPN gateway. This includes SSH access to vm-internal, which is grayed out (unavailable) in the Cloud Console.
In order to connect via SSH to vm-internal, create a bastion host vm-bastion on the same VPC network as vm-internal.
-
In the Cloud Console, on the VM instances page, click Create Instance.
-
Specify the following, and leave the remaining settings as their defaults:
Property Value (type value or select option as specified) Name vm-bastion Region Zone Machine type e2-micro (2vCPU) Identity and API access > Access scopes Set access for each API Compute Engine Read Write -
Click Advanced Options..
-
Click Networking.
-
For Network interfaces.
-
Specify the following, and leave the remaining settings as their defaults:
Property Value (type value or select option as specified) Network privatenet Subnetwork privatenet-us External IPv4 address Ephemeral -
Click Done.
-
Click Create, and wait for the VM instance to be created.
Click Check my progress to verify the objective.
SSH to vm-bastion and verify access to vm-internal
Verify that you can access vm-internal through vm-bastion.
- For vm-bastion, click SSH to launch a terminal and connect.
This should work!
- Connect to vm-internal by running the following command:
- When asked if you want to continue, enter
Y. - When prompted for a passphrase, press ENTER for no passphrase, then ENTER again.
- Test the external connectivity of vm-internal by running the following command:
This should not work because vm-internal has no external IP address!
- Wait for the
pingcommand to complete. - Close the connection to vm-internal by running the following command:
- Close the SSH terminal of vm-bastion by running the following command:
Task 2. Enable private Google access
VM instances that have no external IP addresses can use Private Google Access to reach external IP addresses of Google APIs and services. By default, Private Google Access is disabled on a VPC network.
Create a Cloud Storage bucket
Create a Cloud Storage bucket to test access to Google APIs and services.
-
In the Cloud Console, on the Navigation menu (
-
Click Create.
-
Specify the following, and leave the remaining settings as their defaults:
Property Value (type value or select option as specified) Name Enter a globally unique nameDefault storage class Multi-Regional -
Click Create.
-
Note the name of your storage bucket for the next subtask. It will be referred to as
[my_bucket].
Copy an image file into your bucket
Copy an image from a public Cloud Storage bucket to your own bucket.
- Run the following command in Cloud Shell, replacing
[my_bucket]with your bucket's name:
- In the Cloud Console, click Refresh Bucket to verify that the image was copied.
You can click on the name of the image in the Cloud Console to view an example of how Private Google Access is implemented.
Access the image from your VM instances
- In the Cloud Console, on the Navigation menu (
- For vm-bastion, click SSH to launch a terminal and connect.
- Try to copy the image to vm-bastion by running the following command, replacing
[my_bucket]with your bucket's name:
This should work because vm-bastion has an external IP address!
- Connect to vm-internal by running the following command:
- If prompted, type Y to continue.
- Try to copy the image to vm-internal by running the following command, replacing
[my_bucket]with your bucket's name:
-
To terminate the request after the first attempt, press CTRL+C.
-
Close the SSH terminal.
Enable private Google access
Private Google access is enabled at the subnet level. When it is enabled, instances in the subnet that only have private IP addresses can send traffic to Google APIs and services through the default route (0.0.0.0/0) with a next hop to the default internet gateway.
- In the Cloud Console, on the Navigation menu (
- Click privatenet > privatenet-us to open the subnet.
- Click Edit.
- For Private Google access, select On.
- Click Save.
- In the Cloud Console, on the Navigation menu (
- For vm-bastion, click SSH to launch a terminal and connect.
- Connect to vm-internal by running the following command:
- If prompted, type Y to continue.
- Try to copy the image to vm-internal by running the following command:
This should work as vm-internal's subnet has Private Google Access enabled!
- Close the SSH terminal.
Click Check my progress to verify the objective.
Task 3. Configure a Cloud NAT gateway
Although vm-internal can now access certain Google APIs and services without an external IP address, the instance cannot access the internet for updates and patches. You will now configure a Cloud NAT gateway, which allows vm-internal to reach the internet.
Try to update the VM instances
- For vm-bastion, click SSH to launch a terminal and connect.
- Try to re-synchronize the package index of vm-bastion by running the following:
The output should look like this:
This should work because vm-bastion has an external IP address!
- Connect to vm-internal by running the following command:
- If prompted, type Y to continue.
- Try to re-synchronize the package index of vm-internal by running the following:
This should only work for Google Cloud packages because vm-internal only has access to Google APIs and services!
- Press CTRL+C to stop the request.
- Close the SSH terminal.
Configure a Cloud NAT gateway
Cloud NAT is a regional resource. You can configure it to allow traffic from all ranges of all subnets in a region, from specific subnets in the region only, or from specific primary and secondary CIDR ranges only.
-
In the Cloud Console, on the Navigation menu (
-
Click Get started to configure a NAT gateway.
-
Specify the following:
Property Value (type value or select option as specified) Gateway name nat-config Network privatenet Region -
For Cloud Router, select Create new router.
-
For Name, type nat-router.
-
Click Create.
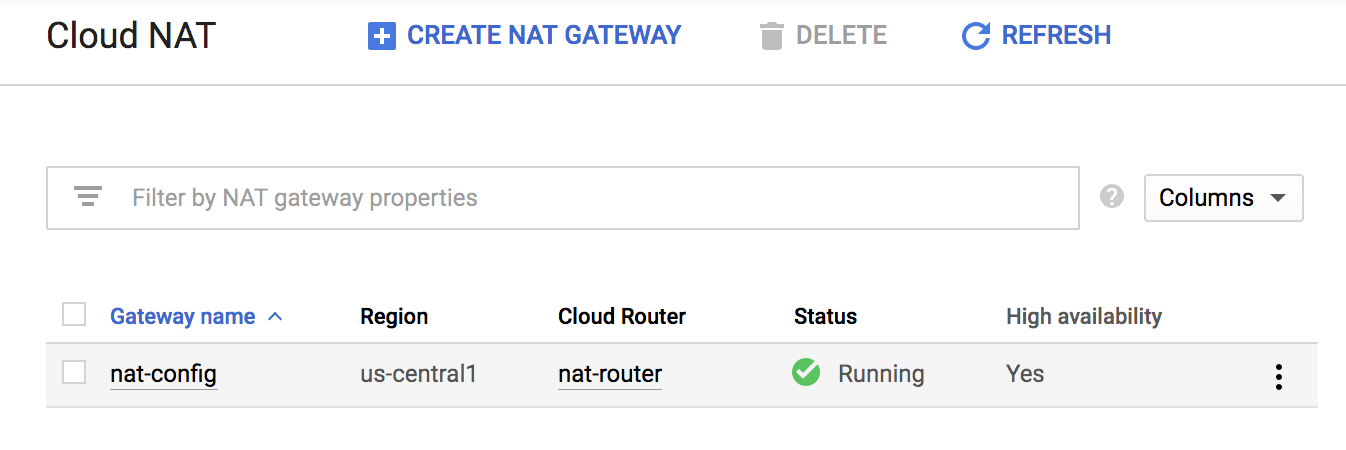
- Click Create.
- Wait for the gateway's Status to change to Running.
Verify the Cloud NAT gateway
It may take up to 3 minutes for the NAT configuration to propagate to the VM, so wait at least a minute before trying to access the internet again.
- In the Cloud Console, on the Navigation menu (
- For vm-bastion, click SSH to launch a terminal and connect.
- Connect to vm-internal by running the following command:
- If prompted, type Y to continue.
- Try to re-synchronize the package index of vm-internal by running the following:
The output should look like this:
This should work because vm-internal is using the NAT gateway!
- Close the SSH terminal.
Click Check my progress to verify the objective.
Task 4. Configure and view logs with Cloud NAT Logging
Cloud NAT logging allows you to log NAT connections and errors. When Cloud NAT logging is enabled, one log entry can be generated for each of the following scenarios:
- When a network connection using NAT is created.
- When a packet is dropped because no port was available for NAT.
You can opt to log both kinds of events, or just one or the other. Created logs are sent to Cloud Logging.
Enabling logging
If logging is enabled, all collected logs are sent to Stackdriver by default. You can filter these so that only certain logs are sent.
You can also specify these values when you create a NAT gateway or by editing one after it has been created. The following directions show how to enable logging for an existing NAT gateway.
-
In the Cloud Console, on the Navigation menu (
-
Click on the
nat-configgateway and then click Edit. -
Click Advanced configurations.
-
Under Stackdriver logging, select Translation and errors and then click Save.
NAT logging in Stackdriver
Now that you have set up Cloud NAT logging for the nat-config gateway, let's find out where we can view our logs. You should have left off on the following page with your gateway updated:
-
Click on
nat-configto expose its details. Then click on the Logs tab. Then click the link to Logging. -
This will open a new tab with Statckdriver logging—ensure that the top of your page resembles the following:
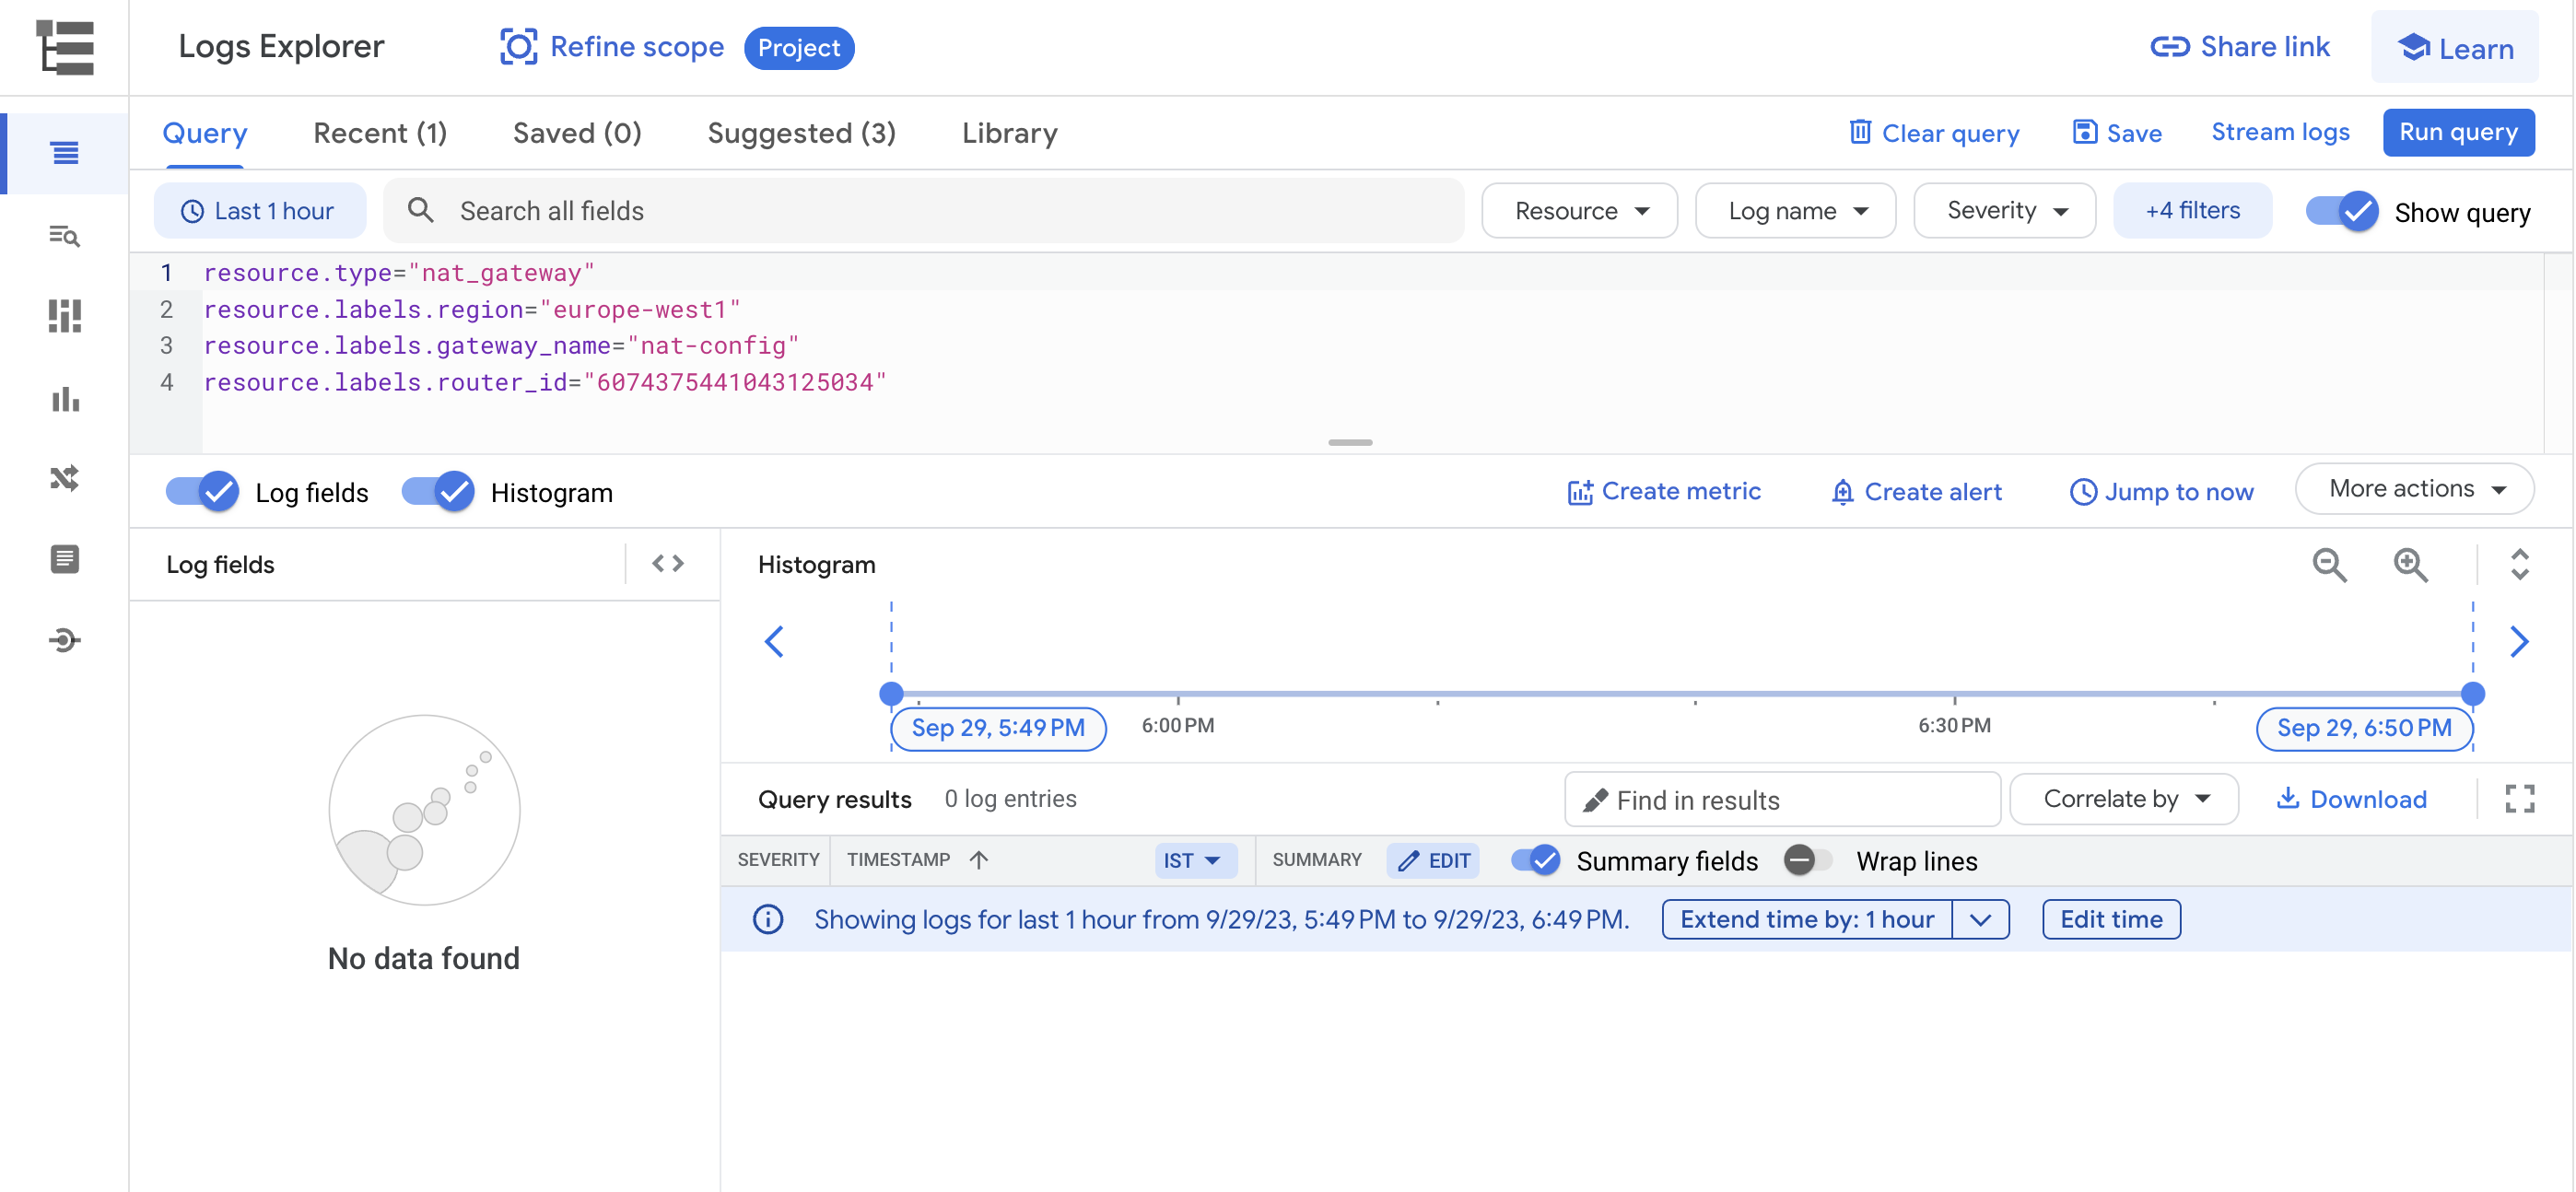
You will see that there aren't any logs yet—that's because we just enabled this feature for the gateway. Keep this tab open and return to your other Cloud Console tab.
Generating logs
As a reminder, Cloud NAT logs are generated for the following sequences:
- When a network connection using NAT is created.
- When a packet is dropped because no port was available for NAT.
Let's connect the bastion host to the internal VM again to see if any logs are generated.
- In the Cloud Console, on the Navigation menu (
- For vm-bastion, click SSH to launch a terminal and connect.
- Connect to vm-internal by running the following command:
- If prompted, type Y to continue.
- Try to re-synchronize the package index of vm-internal by running the following:
The output should look like this:
- Close the SSH terminal.
Let's see if opening up this connection revealed anything new in our logs.
Viewing logs
-
Return to your NAT Logging tab and click the Jump to now button.
-
You should see two new logs that were generated after connecting the bastion host to the internal VM.
As we see, the logs give us details on the VPC network we connected to and the connection method we used. Feel free to expand different labels and details.
Congratulations!
This concludes this self-paced lab, Configuring Private Google Access and Cloud NAT.
You created vm-internal, an instance with no external IP address, and vm-bastion, a bastion host to securely connect to vm-internal. Then you enabled Private Google Access, configured a NAT gateway, and verified that vm-internal can access Google APIs and services and other public IP addresses. Finally, you learned how to configure NAT Logging and how to generate and view those logs in Stackdriver.
VM instances without external IP addresses are isolated from external networks. Using Cloud NAT, these instances can access the internet for updates and patches, and in some cases, for bootstrapping. As a managed service, Cloud NAT provides high availability without user management and intervention.
Next steps / Learn more
- Check out Private Access Options for Services.
- Learn more about NAT gateway at Cloud NAT.
- Check out the lab titled Using a NAT Gateway with Kubernetes Engine.
Google Cloud training and certification
...helps you make the most of Google Cloud technologies. Our classes include technical skills and best practices to help you get up to speed quickly and continue your learning journey. We offer fundamental to advanced level training, with on-demand, live, and virtual options to suit your busy schedule. Certifications help you validate and prove your skill and expertise in Google Cloud technologies.
Manual Last Updated: March 20, 2024
Lab Last Tested: March 20, 2024
Copyright 2024 Google LLC All rights reserved. Google and the Google logo are trademarks of Google LLC. All other company and product names may be trademarks of the respective companies with which they are associated.